
Hello from Luciano and Stefano! 👋
In the last few years we set ourselves onto the Rust learning path. We don’t work with Rust during our daily jobs and we come to be interested in the language for different reasons (more on this later), so we decided to take it easy and invest some of our free time reading books and tutorials, watching videos about Rust and doing occasional coding challenges. Finally after about one year of sporadic studying sessions we felt ready to attempt our first open source Rust project: jwtinfo.
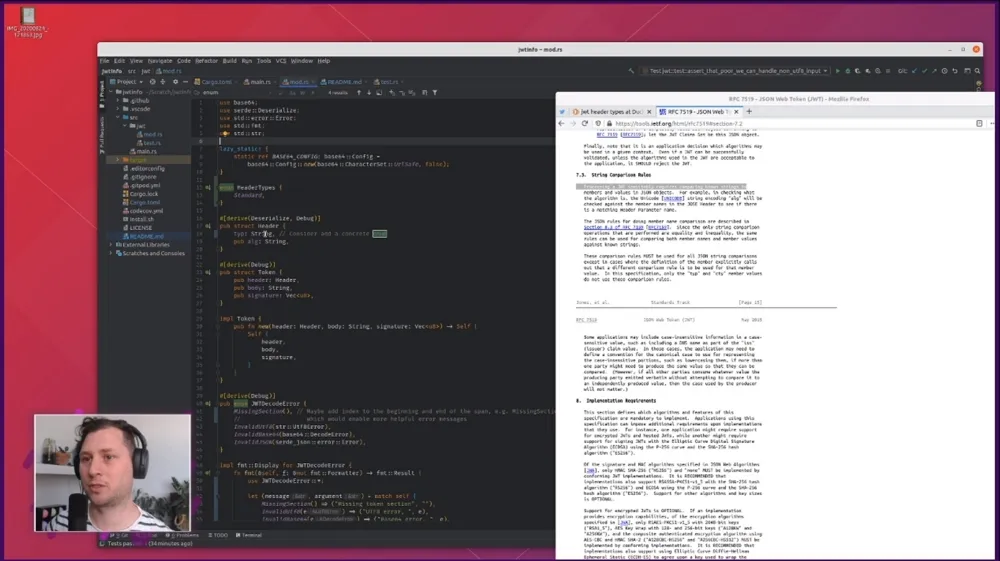
We recently had the pleasure to have our crate reviewed by Tim McNamara of Rust in Action’s fame (one the best Rust books out there in our honest opinion!). The review was carried out live on Tim’s twitch channel and it gave us a lot of cues on things to improve. This article serves as a summary for our experience and memorandum of all the interesting things we learned. If you are learning Rust as well, we hope you will find some of these notes useful!
Our motivation
Before getting into the weeds of what we learned, it probably makes sense for us to give you a little intro on who we are and why we are interested in Rust. If you couldn’t care less about who is writing this, just skip to the next section! 😜
Luciano, considers himself a fullstack cloud developer. His career has been gravitating mostly around building web and cloud-focused products. He has been using mainly high level languages throughout his career (qBasic/VB, Php, JavaScript, Python, Go, Node.js). Node.js is his tool of choice and he is one of the co-authors of the book Node.js Design Patterns (Packt). He is fascinated by Rust because it unveils fundamental topics like memory management and safety which he doesn’t know much about, but he is also interested in using Rust on the web building Rust web servers and frontends with WebAssembly. If you are curious to know more about Luciano, check out the about section of this blog.
Stefano is a long time low-level C/C++ developer who got close to the world of web development in the last few years. Based on his previous experience, Stefano saw in Rust a great potential to write safe and performant code across all the stack.
The project and a quick JWT primer
Just to give you a little bit of context on the project, jwtinfo is a simple command line application (and a library) that allows you to validate and decode a JWTs (JSON Web Tokens) and visualize the content of the “body” (or “payload”) section of the token. If you are not familiar with what JWT is, you can read this 5-minutes article called what’s in a JWT.
jwtinfo is a command line utility that allows you to see what’s inside a JWT. For instance you can run it like this:
jwtinfo eyJhbGciOiJIUzI1NiIsInR5cCI6IkpXVCJ9.eyJzdWIiOiIxMjM0NTY3ODkwIiwibmFtZSI6IkpvaG4gRG9lIiwiaWF0IjoxNTE2MjM5MDIyfQ.SflKxwRJSMeKKF2QT4fwpMeJf36POk6yJV_adQssw5cAnd it will print:
{ "sub": "1234567890", "name": "John Doe", "iat": 1516239022 }Which is essentially the body (or payload) of the token we pass as input to jwtinfo.
Of course, jwtinfo will also tell you if you try to pass a token that is not valid and can’t be parsed correctly, so, in a way, you could also call it a JWT validator, even though, at this time, it does not offer any functionality to validate the token signature against a secret or a public key.
The review
The idea of the code review came up when Tim asked on Twitter what people would be interested to see in a Rust live stream. Luciano took this opportunity to suggest to do some live code review of Rust beginners’ crates. Tim seemed to like the idea and of course at that point we had to volunteer our project 😇
After a couple of weeks Tim proceeded with the live review that you can now watch on YouTube.
Our ask was to get some generic advice around the following topics:
- Project structure
- Error management
- Enums
- Exposing a lib and a cli together
- Testing
- Build process
In hindsight, we reckon that this list might look a bit random and unclear, but nonetheless Tim managed to address most of these points and provided great insights around the concerns we had around these topics.
We are going now to showcase our notes, in no special order and try to provide as much context as possible based on what we learned during the review process and even after it when we decided to go in greater depth on some of the suggested improvements.
Simplified project structure and exposing a CLI and a library
When we started working on this project we just wanted to create a simple command line tool. As we were writing the code, we realized that all the JWT parsing and validation logic could be externalized to its own external module. We didn’t really want to split the project in two, mostly for simplicity, but also because there are many cool JWT crates out there and don’t want to compete or even try to provide feature parity with them. This is a learning project, and as such, we thought it might be nice to expose our JWT parsing layer as a library too. Tim provided 2 interesting pieces of advice. The first one is to simplify the folder structure. It turns out we were following a pattern that was required in Rust 2015 edition, which looks like the following:
src/├── main.rs # our CLI app└── jwt # our internal lib for JWT parsing ├── mod.rs └── test.rsIn Rust 2018 edition it is possible to avoid creating mod.rs files. But why would you want to avoid them in the first place? It turns out that those files tend to be quite anonymous in big projects. If you have many submodules, chances are that you will end up having many tabs open at a given point in time and they would all be saying mod.rs. It will probably take you a while to be able to navigate through them and find the file you were looking for. What we learned is that with Rust 2018 we could simply promote src/jwt/mod.rs to src/jwt.rs. No other code change required: all the imports still work as a charm! So now our code structure looks like this:
src/├── main.rs├── jwt.rs└── jwt/ └── test.rsThis seems much better, we like flatter structures and descriptive file names! If you are curious to find out more about this there is an official piece of documentation recommending no more mod.rs!
In order to expose the jwt.rs module as part of the public library we finally had to do a couple of minor changes in our cargo.toml and in our main.rs.
Our cargo.toml needed to have new sections indicating how to compile the project for the different targets (CLI application and library). We achieved that by adding the following lines:
[lib]name = "jwtinfo"path = "src/main.rs"
[[bin]]name = "jwtinfo"path = "src/main.rs"
If you are wondering why lib comes with only one pair of square brackets while bin comes with two, well we had the same question too! We found an answer in the official cargo documentation:
The double-bracket sections like
[[bin]]are array-of-table of TOML, which means you can write more than one[[bin]]section to make several executables in your crate. You can only specify one library, so[lib]is a normal TOML table.
Once we applied these changes, everything seemed to work great. Except, when we published the changes on GitHub we started to our CI being polluted by the following warning:
“file found to be present in multiple build targets”
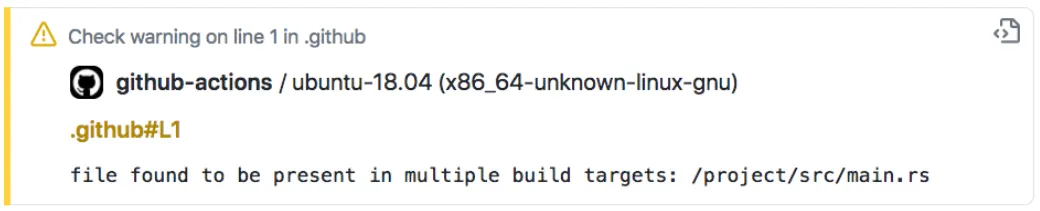
Once again, we had to roll up our sleeves and try to figure out what this actually meant. We found the answer in a Cargo issue where Alex Chricton suggested the following solution:
[…] we’d recommend either using a library or a
mod foopointing to the same location. If you use a shared library crate then you’ll get better compile times though!
So, finally we managed to resolve this issue by moving all our CLI logic into a dedicated cli.rs file and changed the content of the original main.rs into this:
pub mod jwt;
#[macro_use]extern crate lazy_static;
Note how we also marked the jwt sub-module as public, so that it is actually accessible to whoever is using the library.
Finally our cargo.toml, now looks like the following:
[lib]name = "jwtinfo"path = "src/main.rs"
[[bin]]name = "jwtinfo"path = "src/cli.rs"
And our files structure looks like this:
src/├── cli.rs├── jwt.rs├── main.rs└── jwt/ └── test.rsAnd that annoying warning disappeared. Plus, we are probably getting slightly faster compile times now! ⚡️
Document all the things
One thing that we completely neglected so far was documentation. Rust has an amazing built-in utility to be able to document the API of crates and even to publish them online. There is even an official piece of documentation that gives guidance on how to write useful documentation comments.
If you just want to get started with writing docs for your crates, probably the easiest thing to do is to check out the “Rust by example” page about documentation.
As you start adding documentation comments to your crate, you can simply run cargo doc --open to compile the website with the documentation locally and open it with your browser. This is extremely convenient to make sure that, once you publish the crate, the documentation online will look as expected.
Few days after the review we rolled up our sleeves and started to document our library. If you are curious to see what it took to go from 0 to 100, this is our PR that added documentation to the crate: lmammino/jwtinfo/pull/22.
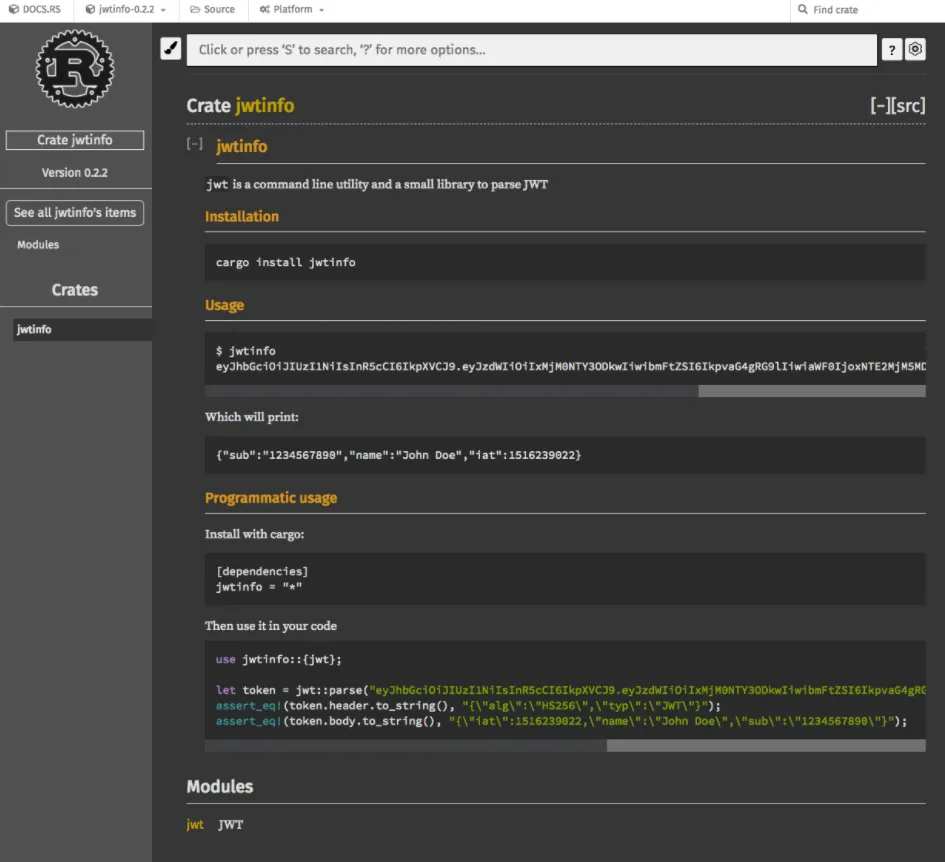
One of the most amazing thing was that, once we published a new version of the crate on crates.io, after few minutes we could navigate our crate doc online at docs.rs/jwtinfo:
Another thing that we loved about writing documentation in Rust is the ability to execute code examples to make sure they are actually correct. Just to show a real example, this is a piece of documentation in our crate:
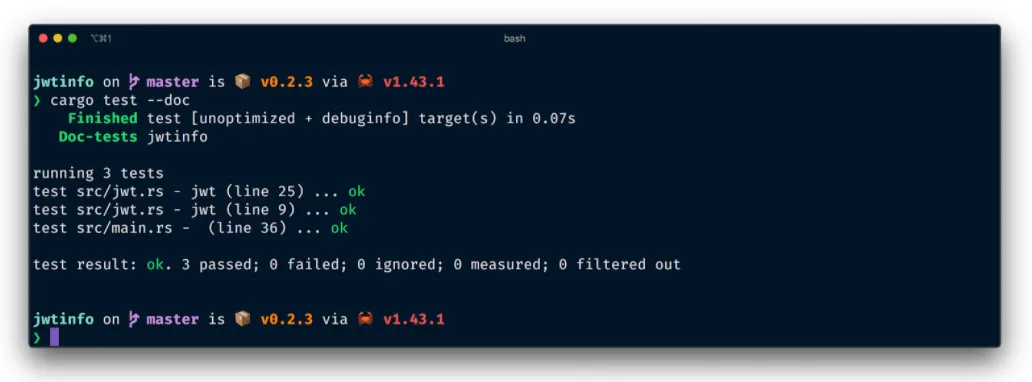
//! To parse a given JWT as a string://!//! ```rust//! use jwtinfo::{jwt};//!//! let token_str = "eyJhbGciOiJIUzI1NiIsInR5cCI6IkpXVCJ9.eyJzdWIiOiIxMjM0NTY3ODkwIiwibmFtZSI6IkpvaG4gRG9lIiwiaWF0IjoxNTE2MjM5MDIyfQ.SflKxwRJSMeKKF2QT4fwpMeJf36POk6yJV_adQssw5c";//! match jwt::parse(token_str) {//! Ok(token) => {//! // do something with token//! assert_eq!(token.header.to_string(), "{\"alg\":\"HS256\",\"typ\":\"JWT\"}");//! assert_eq!(token.body.to_string(), "{\"iat\":1516239022,\"name\":\"John Doe\",\"sub\":\"1234567890\"}");//! }//! Err(e) => panic!(e)//! }//! ```When we run our test suite with cargo test, Cargo will also extrapolate this example here from the docs and execute it. This will help us make sure that our documentation is actually correct and that it doesn’t go stale over time.
If you have a big test suite and you just want to run your doc tests you can simply do that with cargo test --doc.
Finally, another small trick we discovered is that you can hide specific functions or types from the generated documentation (in case those are private details you don’t want to expose to the crate users). Hiding documentation members is as simple as adding the following annotation:
#[doc(hidden)]For instance, in our crate we have:
#[doc(hidden)]fn parse_base64_string(s: &str) -> Result<String, JWTParseError> { let s = base64::decode_config(s, *BASE64_CONFIG)?; let s = str::from_utf8(&s)?; Ok(s.to_string())}This is convenient because we don’t want any user of our crate to bother with this function which is just an implementation detail that we might decide to change in the future.
Convert a string to anything
Another great suggestion from Tim to improve the ergonomics of the JWT parsing library was to implement the str::FromStr trait for the Token type.
The FromStr trait is a special Rust trait that allows to convert a string into any type that implements the trait.
This trait is already implemented in some standard type like int32 and is what allows us to convert a string to an int32 as follows:
let value = "1987";let result = value.parse::<i32>().unwrap();By the way, if you find the syntax function::<type>() weird, don’t worry, we found it a bit “unfriendly” too. Once we discovered it is called “turbofish” we couldn’t help but to fall in love with it. You can learn more about it here: Where to put the turbofish.
Don’t worry, if you still don’t like the turbofish syntax, you can rewrite the code above using type hints as follows:
let value = "1987";let result : i32 = value.parse().unwrap();The official docs as a great example that shows how the str::FromStr trait can be very valuable to implement in your custom types. We are going to try to take this example and present it here in a slightly simplified fashion.
Imagine you have defined a Point type as follows:
#[derive(Debug, PartialEq)]struct Point { x: i32, y: i32}Now imagine you are processing data from a text source, let’s say a file, and in there points are encoded in a string format such as 17,22. Wouldn’t it be nice to be able to easily turn this format of strings into Point values?
Well, let’s enable this using the str::FromStr trait:
use std::str::FromStr;use std::num::ParseIntError;
#[derive(Debug)]struct Point {    x: i32,    y: i32}
impl FromStr for Point {    type Err = ParseIntError;
    fn from_str(s: &str) -> Result<Self, Self::Err> {        let mut parts = s.split(",");        let x_str = parts.next().unwrap_or("0");        let y_str = parts.next().unwrap_or("0");        let x = x_str.parse::<i32>()?;        let y = y_str.parse::<i32>()?;        Ok(Point { x, y })    }}
fn main() {    let value = "17,22";    let point = value.parse::<Point>().unwrap();    println!("{:?}", point); // Point { x: 17, y: 22 }}
As you can see from the example above, the str::FromStr trait has the following spec:
impl FromStr for YourType {    type Err = YourErrorType;
    fn from_str(s: &str) -> Result<Self, Self::Err> {        // process the string `s` and return a Result        // either a Err(YourErrorType) or        Ok(YourType{})    }}
In our project it was rather trivial to implement this trait, because our parse function matches quite closely the signature of the from_str method defined in the str::FromStr trait:
impl FromStr for Token {    type Err = JWTParsePartError;
    fn from_str(s: &str) -> Result<Self, Self::Err> {        parse(s)    }}
This allows for the following syntax:
let token = "eyJhbGciOiJIUzI1NiIsInR5cCI6IkpXVCJ9.eyJzdWIiOiIxMjM0NTY3ODkwIiwibmFtZSI6IkpvaG4gRG9lIiwiaWF0IjoxNTE2MjM5MDIyfQ.SflKxwRJSMeKKF2QT4fwpMeJf36POk6yJV_adQssw5c".parse::<jwt::Token>().unwrap();or, if you still hate the poor turbofish:
let token: jwt::Token = "eyJhbGciOiJIUzI1NiIsInR5cCI6IkpXVCJ9.eyJzdWIiOiIxMjM0NTY3ODkwIiwibmFtZSI6IkpvaG4gRG9lIiwiaWF0IjoxNTE2MjM5MDIyfQ.SflKxwRJSMeKKF2QT4fwpMeJf36POk6yJV_adQssw5c".parse().unwrap();Accept any type that can be converted to string
For better or for worse, Rust is famous for having a number of different types to represent strings. The most famous are String and &str but from time to time we have seen even other types like CStr or OsStr.
During the review process, Tim recommended making our public API more flexible by supporting “every type that can be converted to a string”.
The way we can achieve that is by leveraging the std::convert::AsRef trait.
The official documentation starts with a “not very friendly” opening (at least for Rust noobs like ourselves), but then it provides a great example that makes quite obvious how to use this trait to support any type of string:
fn is_hello<T: AsRef<str>>(s: T) {   assert_eq!("hello", s.as_ref());}
let s = "hello";is_hello(s);
let s = "hello".to_string();is_hello(s);
Essentially, whenever you want to accept “anything that can be converted to a string” you can use the following recipe:
- Make your function accept an argument
xof generic typeT - Define
Tso that it must implement the traitAsRef<str> - In your function body get the actual
strvalue fromxusingx.as_ref()
As you can see from the example above, with this recipe, we can pass both &str and String values to the is_hello function.
Applying this pattern to our code was quite straightforward. Also, since our public surface is quite small, we only needed to change the jwt::parse function as follows:
pub fn parse<T: AsRef<str>>(token: T) -> Result<Token, JWTParsePartError> { let mut parts = token.as_ref().split('.'); // ...}Remove code duplication
One of the things that amazed us when we started playing with Rust was to discover that Rust is primarily an expression language.
In practice, this means that most syntax elements, including if-else and match, once evaluated will produce a value that can be carried over to other expressions or assigned to a variable.
Coming from languages that don’t have this capability, we easily forget to take advantage of this characteristic of Rust and we end up writing code that contains duplication or that is more verbose than necessary.
Tim spotted a few places where we could get rid of annoying code duplication by simply using match and if-else in a different way. This made us go through the code base of our crate and find other places where we could improve readability and make our code more idiomatic.
Let’s show some examples:
if matches.is_present("header") { println!("{}", jwt_token.header.to_string());} else { println!("{}", jwt_token.body.to_string());}This code has clearly some repetition. It is not terrible, but it seems unnecessary to have to repeat the println!() macro invocation and the to_string() call.
We ended up refactoring this as follows:
let part = if matches.is_present("header") { jwt_token.header} else { jwt_token.body};println!("{}", part.to_string());Once you know that if-else expressions will produce a value (depending on which branch will be selected at runtime), this alternative looks more readable. Also this refactoring makes quite clear that this code has essentially 2 parts: select a part, then print it on the standard output.
Another interesting example in our code base involved the match expression. This was the code before the refactoring:
impl fmt::Display for JWTParseError { fn fmt(&self, f: &mut fmt::Formatter) -> fmt::Result { match self { JWTParseError::MissingSection() => write!(f, "{}", "Missing token section".to_string()), JWTParseError::InvalidUtf8(e) => write!(f, "UTF8 error, {}", e), JWTParseError::InvalidBase64(e) => write!(f, "Base64 error, {}", e), JWTParseError::InvalidJSON(e) => write!(f, "JSON error, {}", e), } }}Applying the same principle as before we refactored the code above to this:
impl fmt::Display for JWTParseError { fn fmt(&self, f: &mut fmt::Formatter) -> fmt::Result { let message = match self { JWTParseError::MissingSection() => "Missing token section".to_string(), JWTParseError::InvalidUtf8(e) => format!("UTF8 error, {}", e), JWTParseError::InvalidBase64(e) => format!("Base64 error, {}", e), JWTParseError::InvalidJSON(e) => format!("JSON error, {}", e), }; write!(f, "{}", message) }}Again, the trick here is to assign the result of the match expression to a variable (message in this particular case) and then we can re-use that variable in the next step.
Another cool thing that we discovered is that, by using clippy as a linter, it will help you out to spot some of these improvements.
For instance, the first time we tried to improve the readability of the if-else expression previously mentioned we ended up using a match expression unnecessarily:
let part = match matches.is_present("header") { true => jwt_token.header, false => jwt_token.body,};println!("{}", part.to_string());When we run clippy on this code, it did trigger the match_bool rule and that it is suggested to refactor this with an if-else expression:
let part = if matches.is_present("header") { jwt_token.header} else { jwt_token.body};Which is indeed more readable. Another lesson learned: trust linters!
In short, these types of change helped us to reduce the amount of inline composition and to make the code more sequential and easy to follow.
Improve tests for invalid strings
Another thing that Tim recommended us to do was to improve our coverage on testing different types of input. He tried to run our JWT parser against strings with non-utf8 characters and strings containing null bytes to see whether our code would handle that correctly (returning an error) or whether it would just panic.
The idea is to try to avoid panics at all costs and make sure all possible errors are handled and propagated correctly.
This pushed us to increase our test coverage adding a few more tests as you can see in this PR.
Another interesting recommendation was to use something like quickcheck to do fuzzy testing on our input. Although this seems like an extremely interesting thing to do, we haven’t got time yet to play with this idea.
Shell scripts deserve some love too
As a last point, Tim had a look at our cross-system installation script and immediately noticed our poor use of Bash scripting.
The main advice here was to use some shell linter like Shellcheck. Tim himself, ran the script against the linter by copy pasting the code on the web page and submitted a PR with some improvements.
Shellcheck can be used as a command line tool too, so it would be nice in feature release to integrate in our automated tests.
Conclusion
This concludes our recap article. We don’t have any special rule of thumb except that the Rust ride was quite fun for us so far. It has been a bumpy road but thanks to the amazing open source community and people like Tim, the road to learn Rust can become much smoother.
Our final word of advice is that, if you are learning Rust, or any other technology for what matters, don’t be afraid to start public open source projects and ask for help and reviews. Even better if you share this journey with some friends.
At the end of the day, all that matters is learning new things and having fun!
We take one more opportunity to thank Tim for the great support here and, if you like Rust, we do recommend you to follow him on Twitter, Twitch and Youtube.
Take care! 🙌